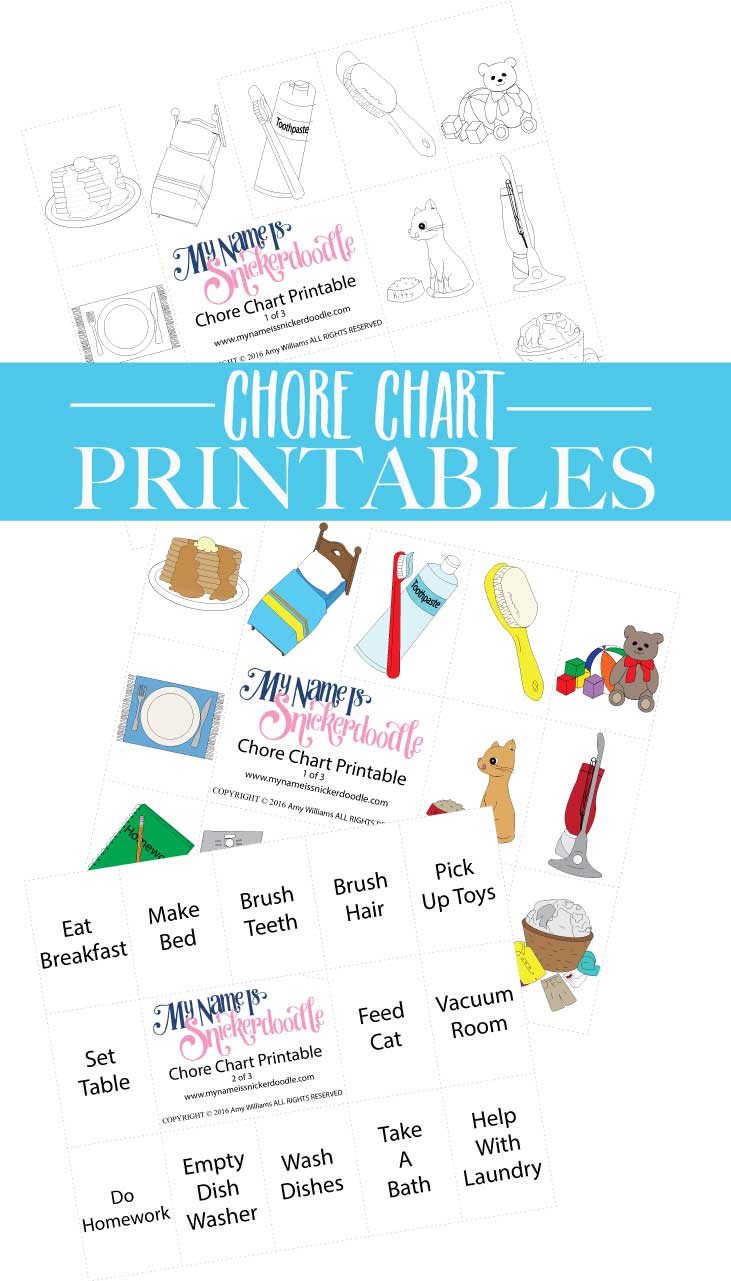
*Edit PLEASE READ* In 2016 I created two chore chart image printables that coordinate with this chore chart tutorial. Here is the Chore Chart Color Printable Version and the Chore Chart Black and White Printable Version. They are different than the images in the tutorial.
Sometimes I am completely surprised by what people pin from my site. Mostly it’s recipes (which I love), but it usually the things that I want to be pin blasted aren’t and the totally random items that go viral.
Go figure.
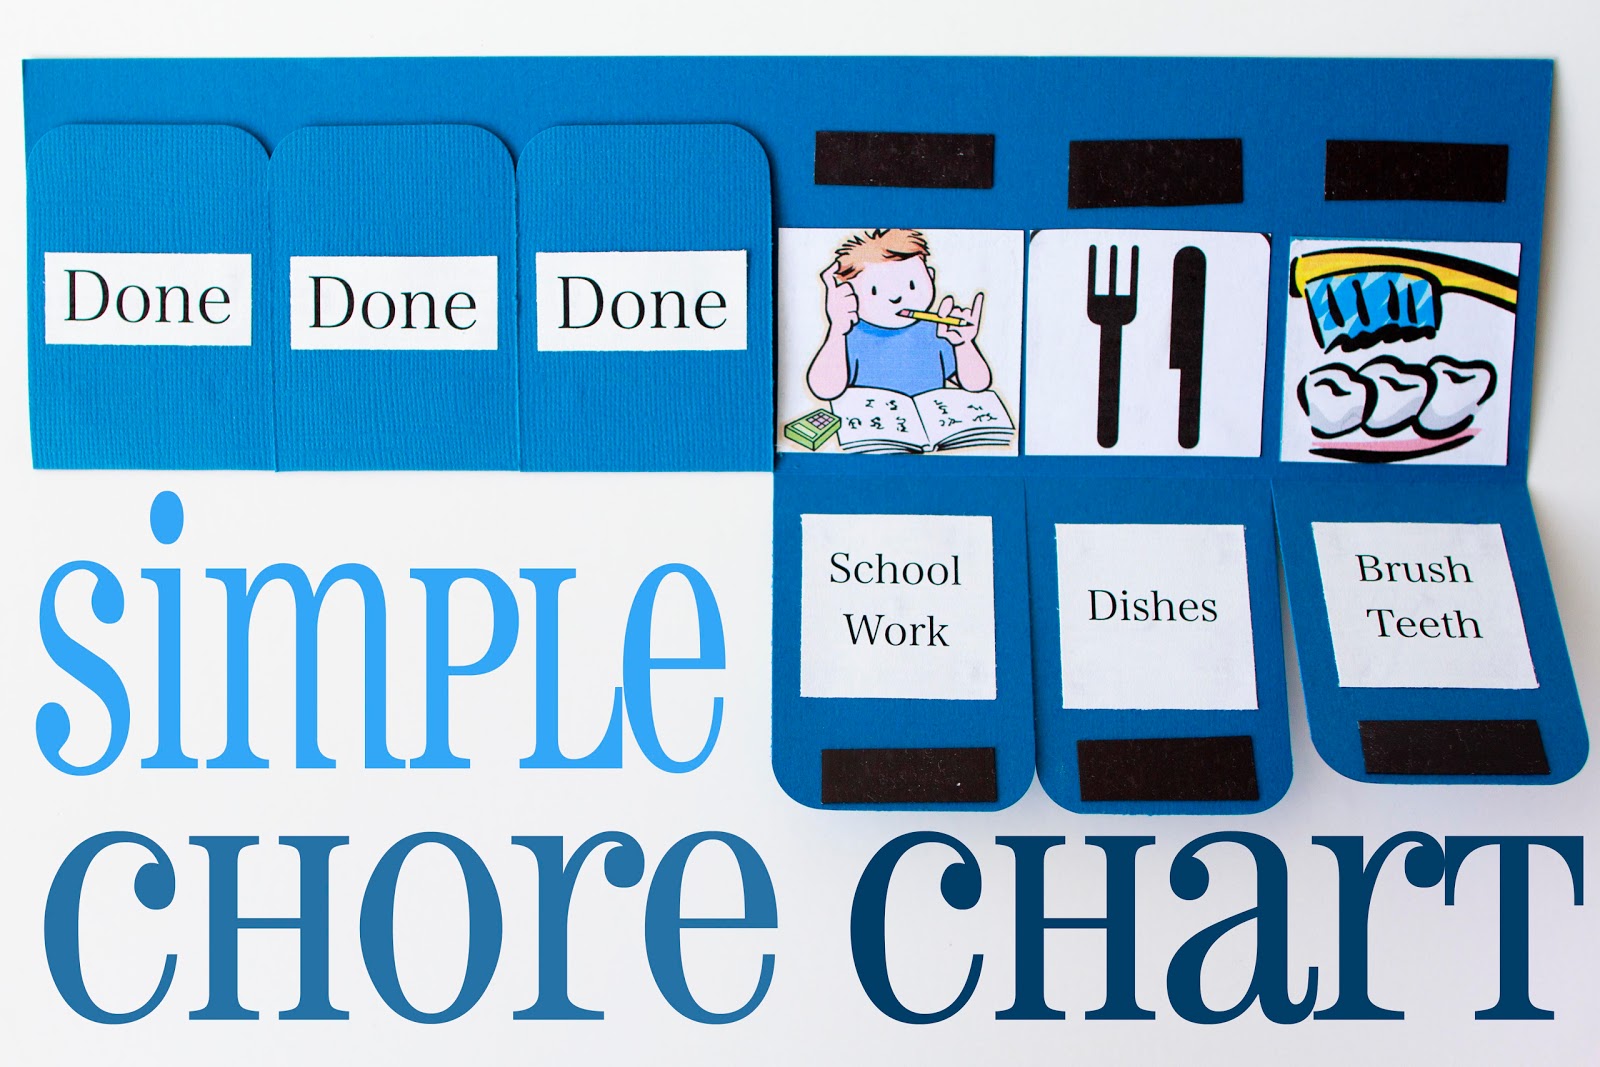
This chore chart for instance (which I talked about back here), has been seen all over lately and I have received many emails and messages wanting to know exactly how I made it. (By the way…we are getting closer to meeting the giveaway goal so keep it up!)
Thanks! What a compliment!
Before you go on any further here is a great way to use this chore chart during those crazy summer months as well!
A few things before we get started. I got each of my images off the internet. I had big plans of taking a picture of each of these things in our house, but life is life and Liam could have cared less what the picture looked like. It was more for my sake! I could have made this a lot more “polished”, but I feel this gets the job done.
You can adapt this idea to whatever fits your needs best. Some suggested using it as a routine chart or even as a homework chart going over different subjects. Whatever you end up doing, I would love to see what you come up with!
I have to say, this works really well for Liam (5 almost 6). We’ve been using it for months now and all I have to say is, “Go look at your chore chart and see what needs to be done.” What I love about this most is that there are no pieces to go missing. No box that needs to be marked off. Just a pure and simple chore chart.
So per your requests…here you go!


You will need…
6×12 piece of colored card stock
A trimmer with a score blade
Magnetic sticky paper or thin magnetic sticky strips
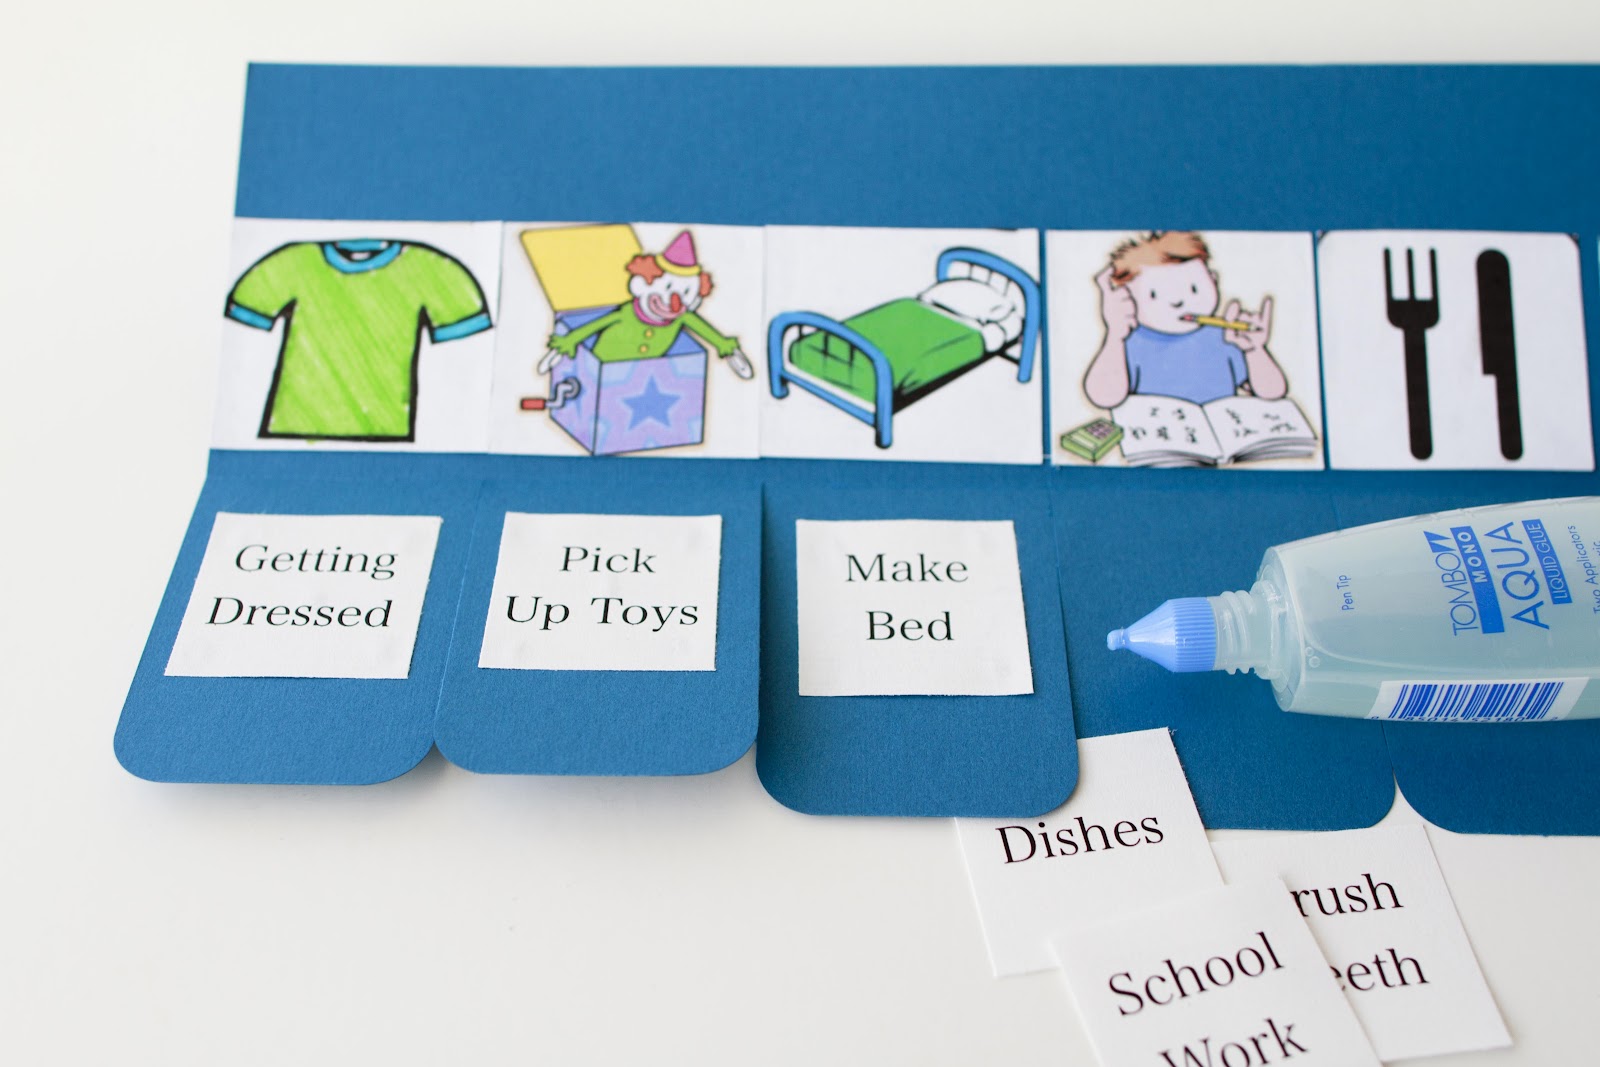
Images cut into 2×2 squares
Chore description printed and cut into 1 1/2 x 1 1/2 squares
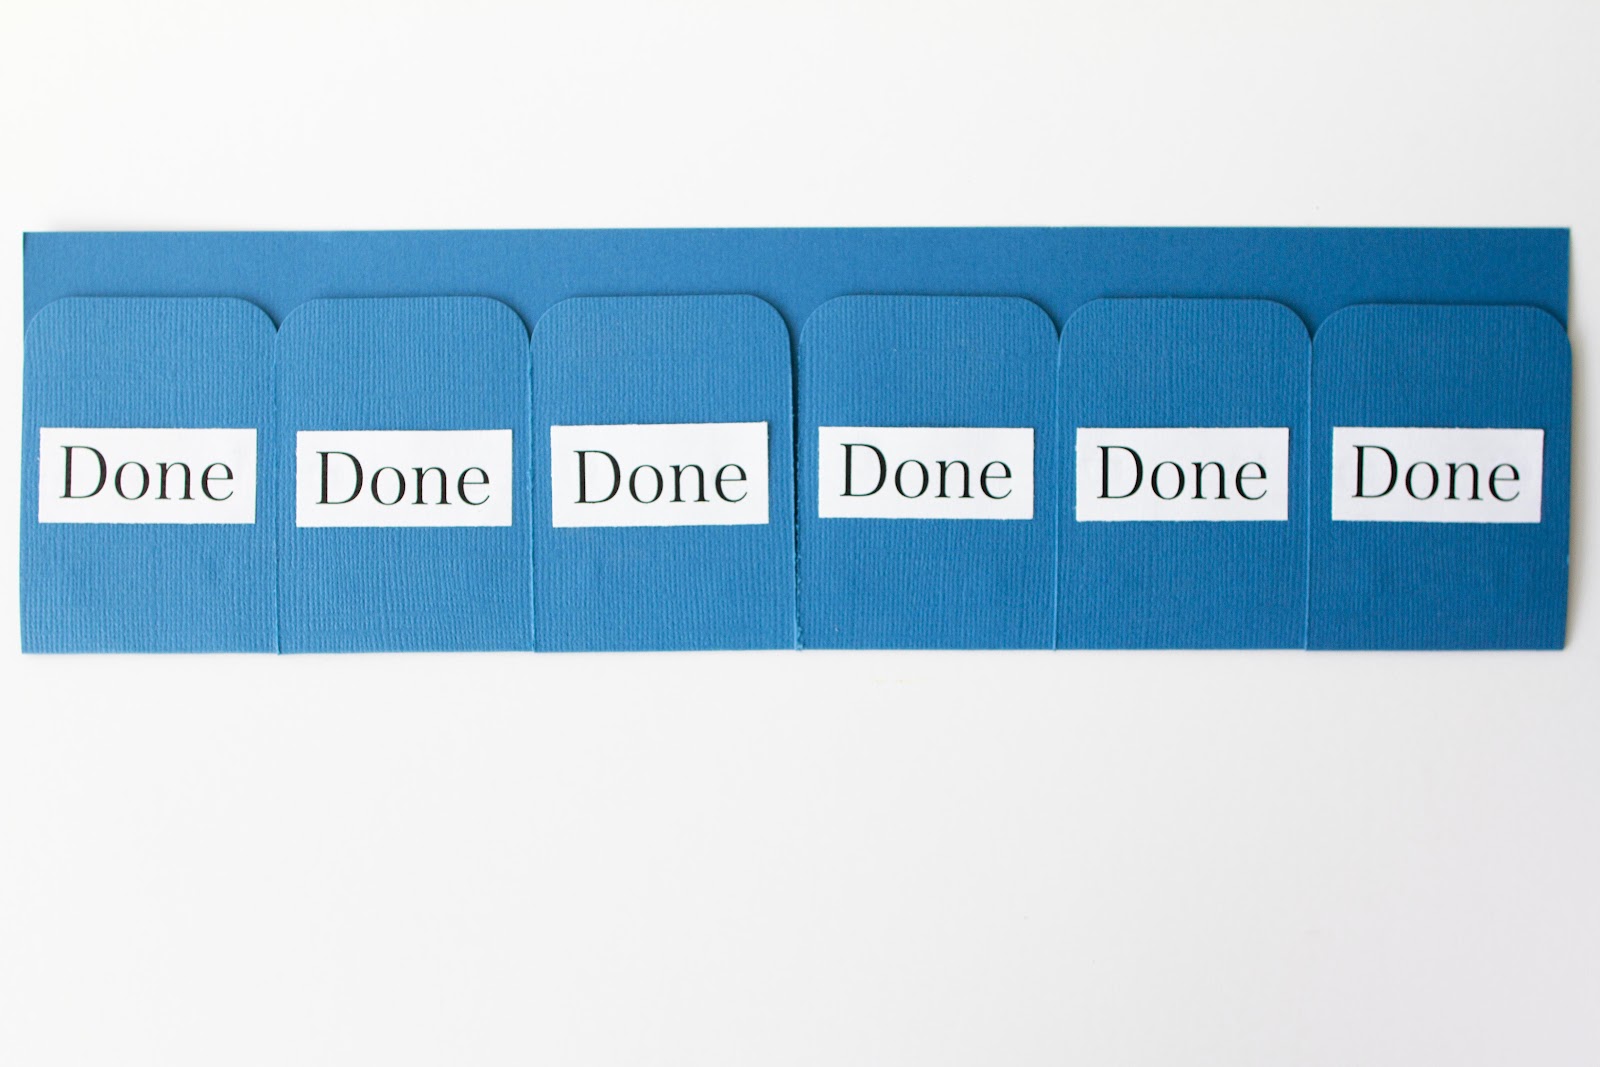
DONE printed 6 times and trimmed to fit
Glue
Corner Rounder

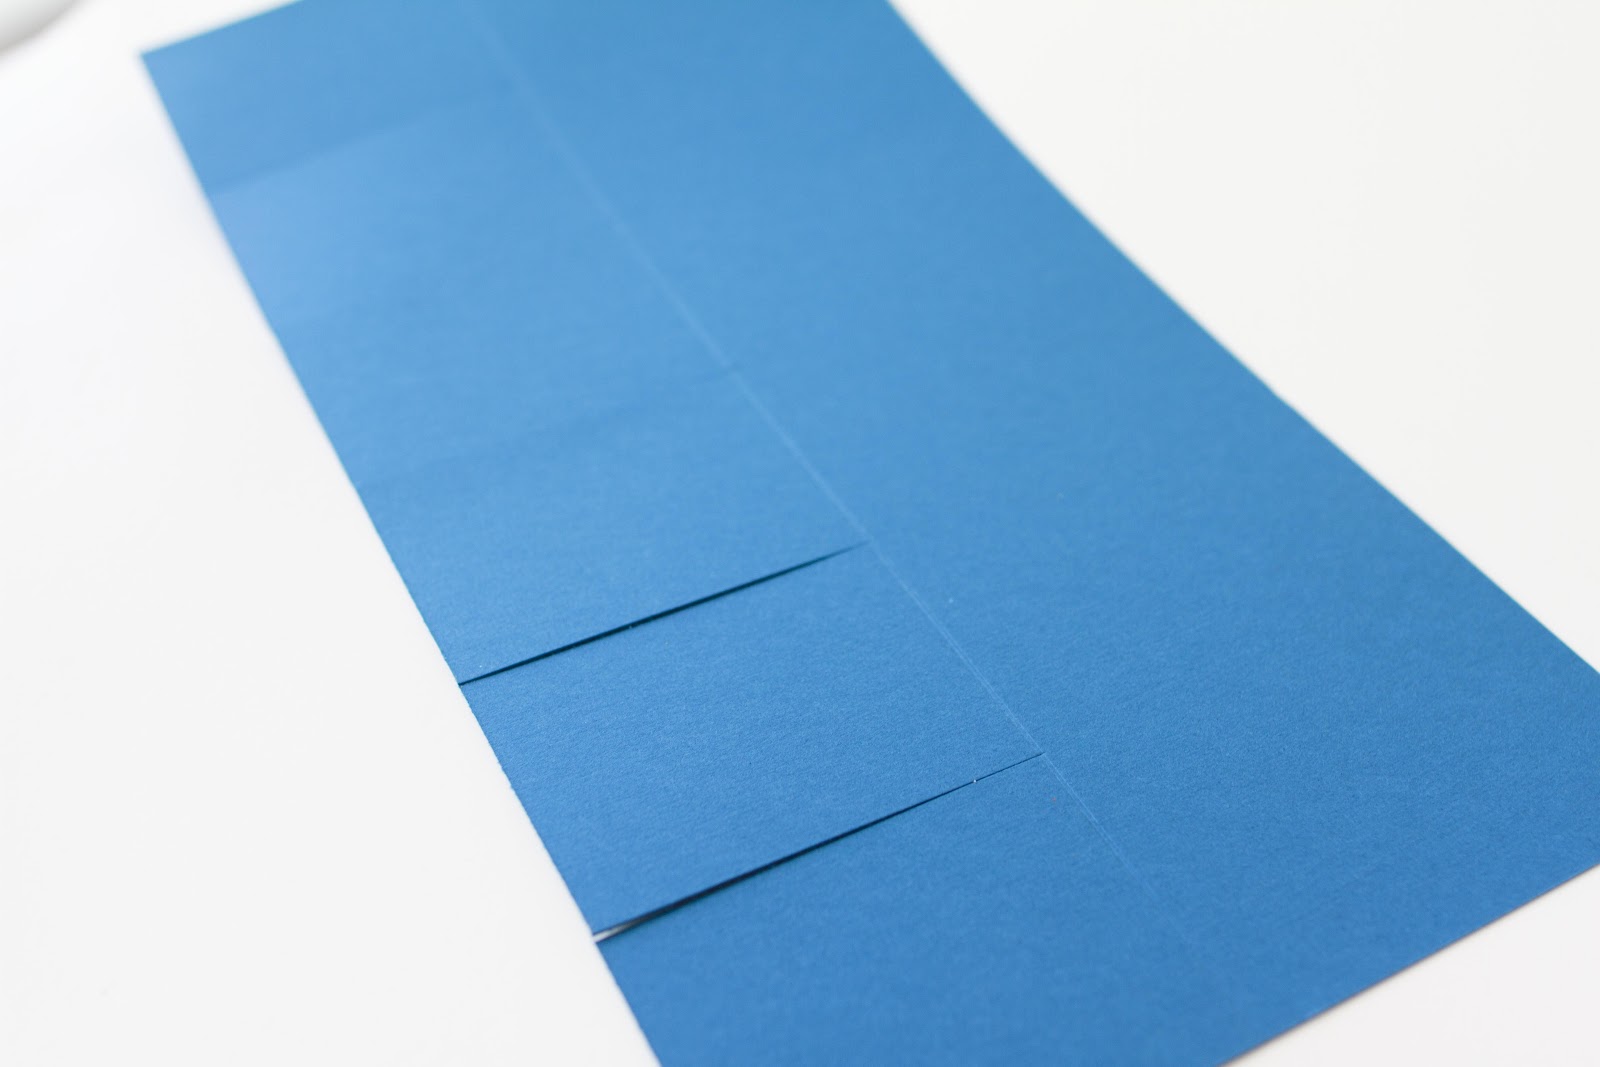
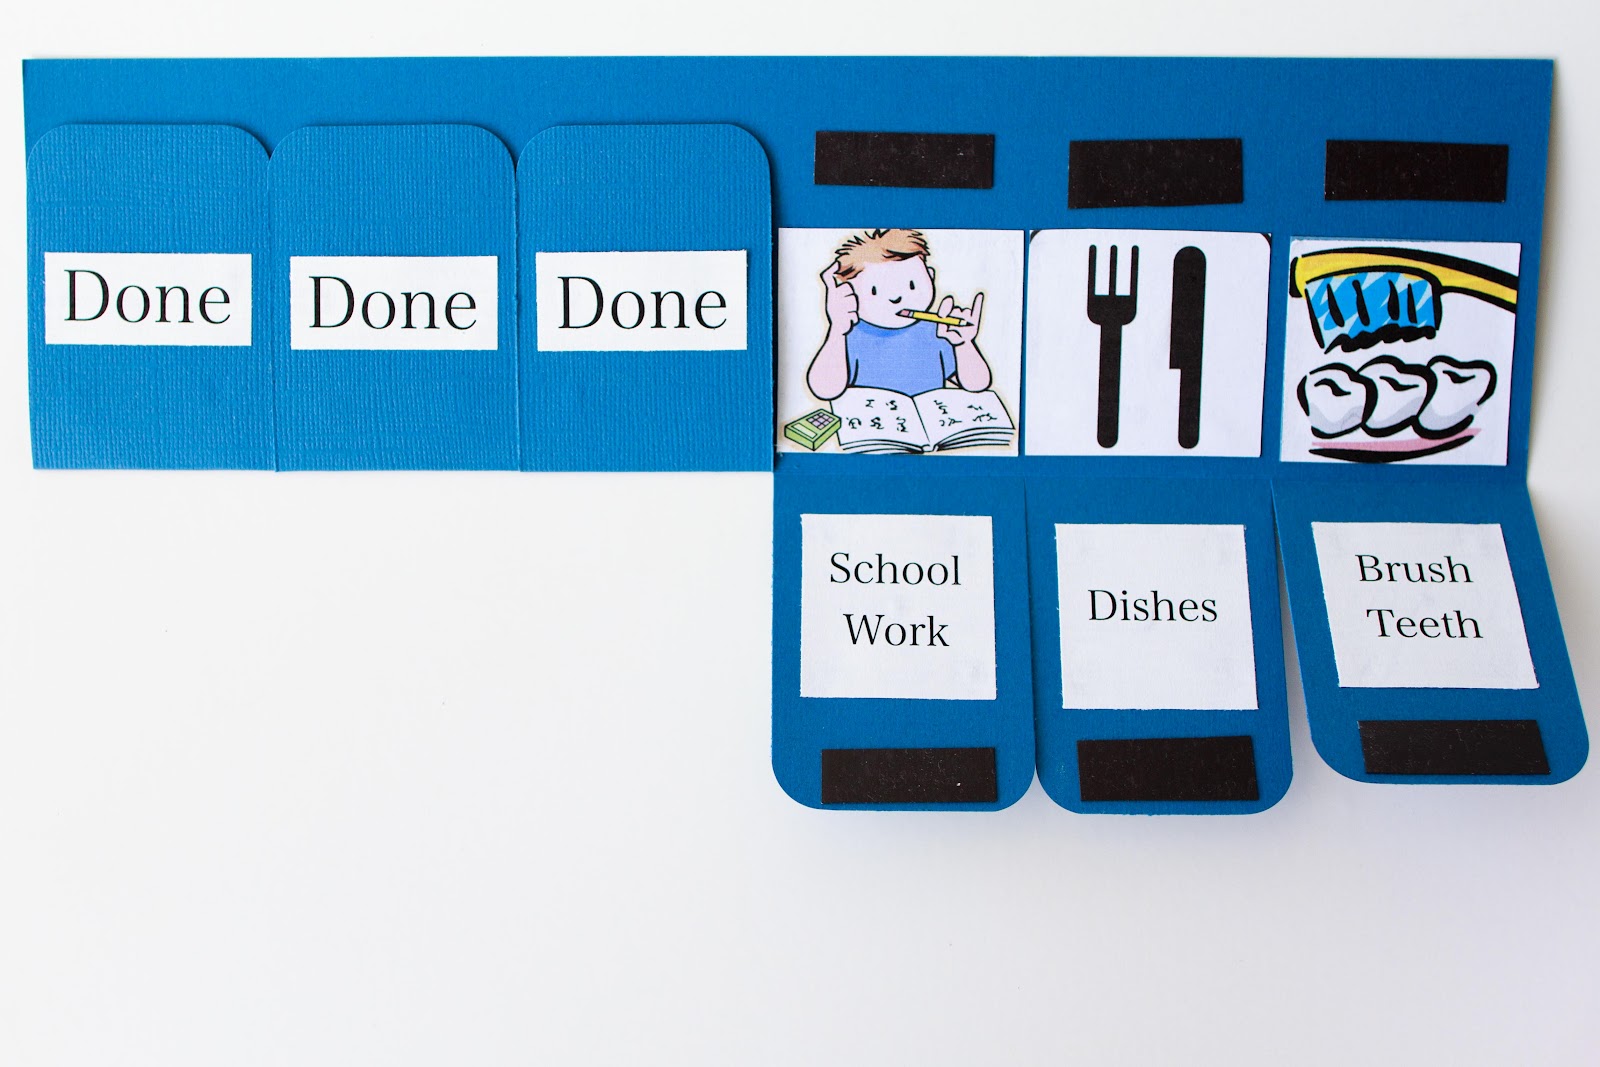
1. Score your paper lengthwise at 3 1/4 inches.

2. Your paper will now be divided 3 1/4 and 2 3/4. On the 2 3/4 side cut up to the score line every 2 inches. This will create 6 front flaps.
3. Fold each of those flaps up.
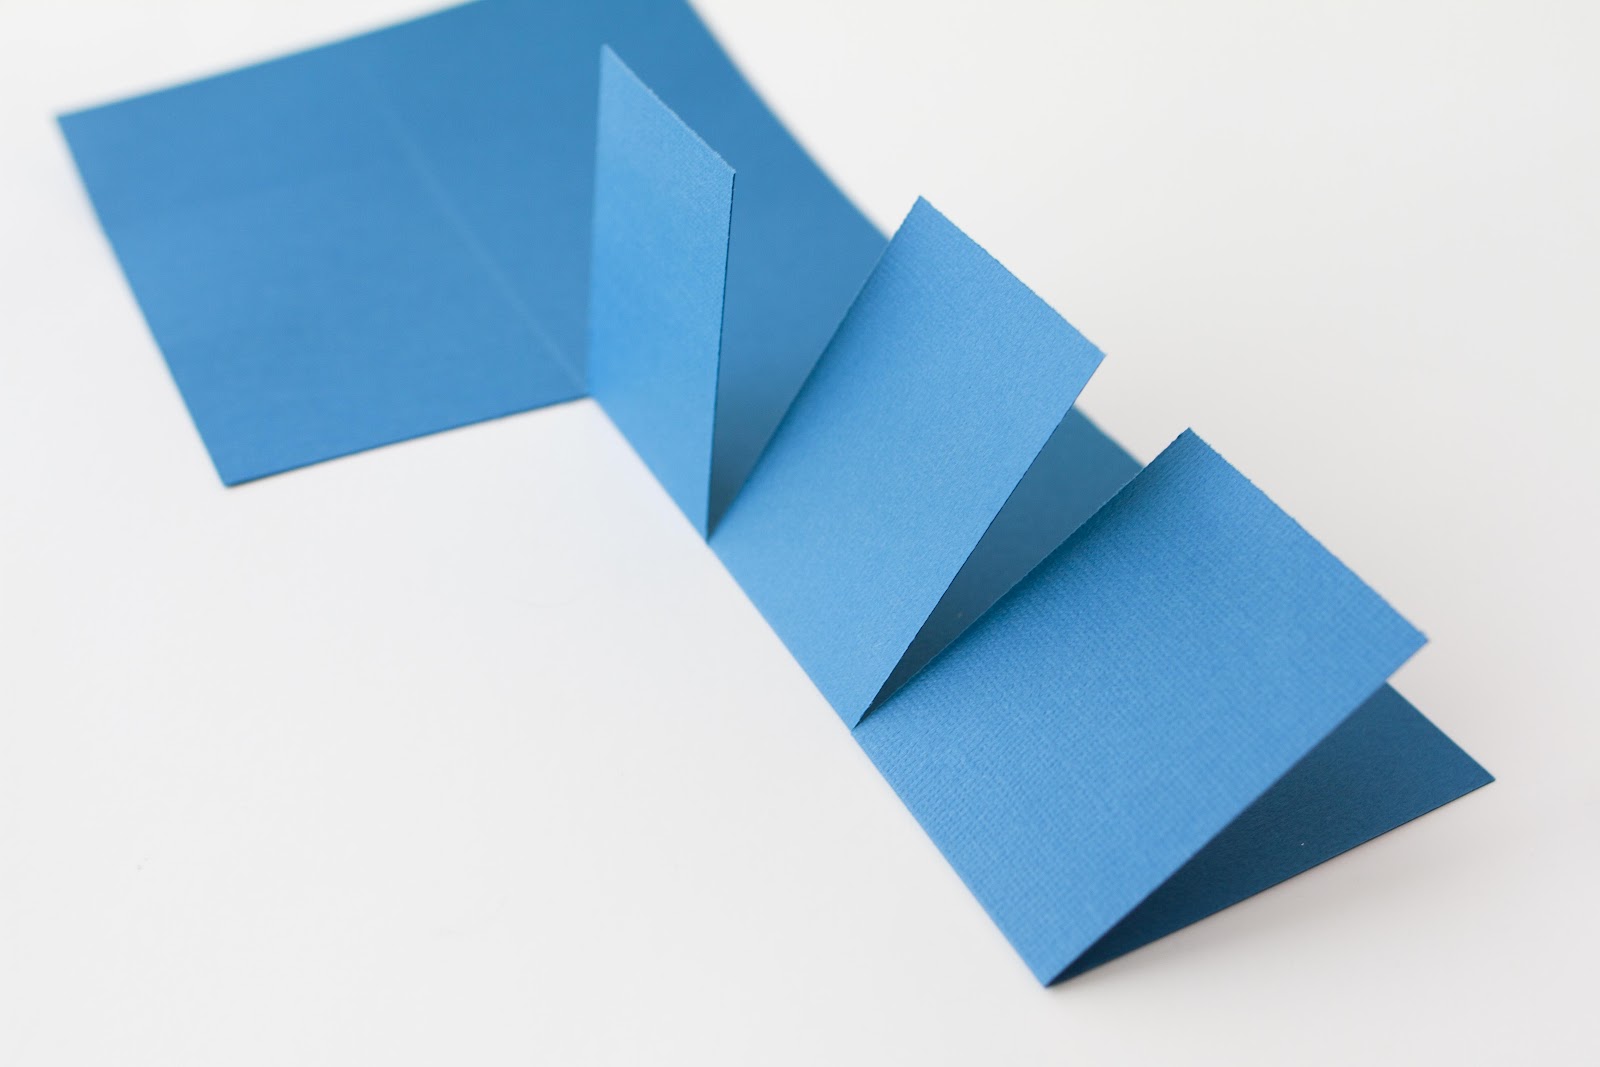
4. Using your corner rounder, round the top two corners of each flap.

5. Adhere your images in the order you would like to see them done. You will want to glue them close to the score line.
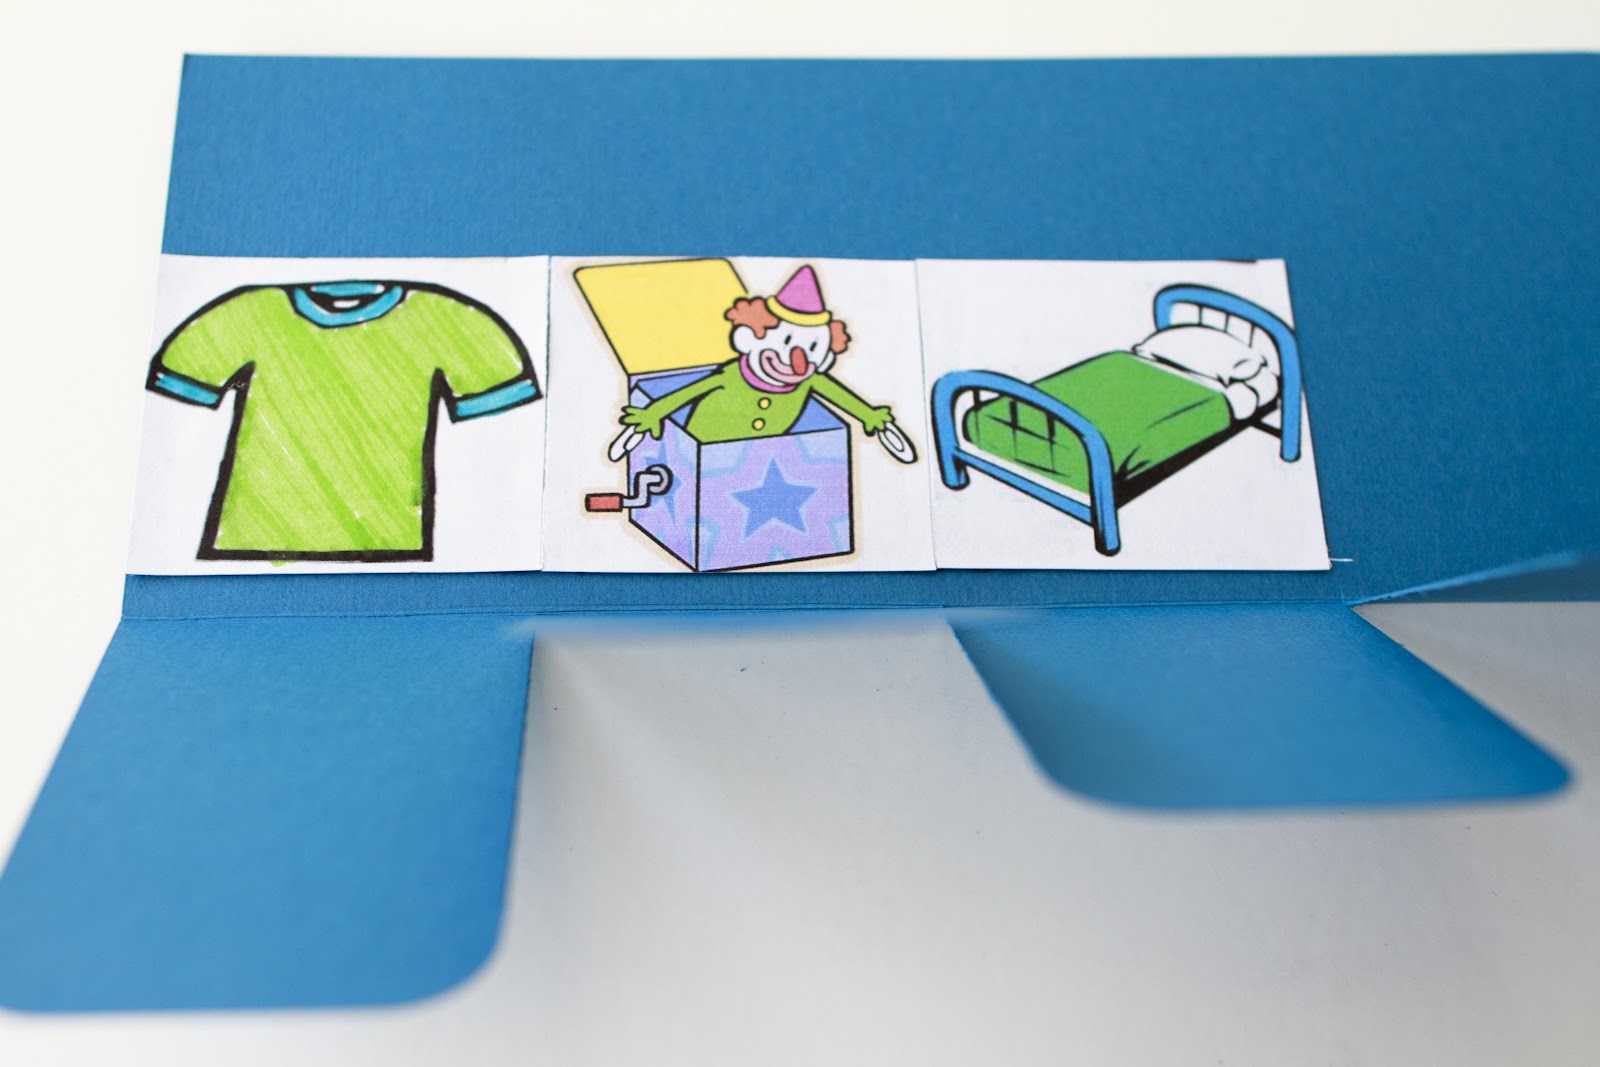
6. Adhere each of the descriptions onto the inside center of each flap.
7. Cut your magnetic paper or strips into small rectangles about 1 1/2 long. Place two right sides together. Peel off the sticker of one and place on the bottom of the flap.
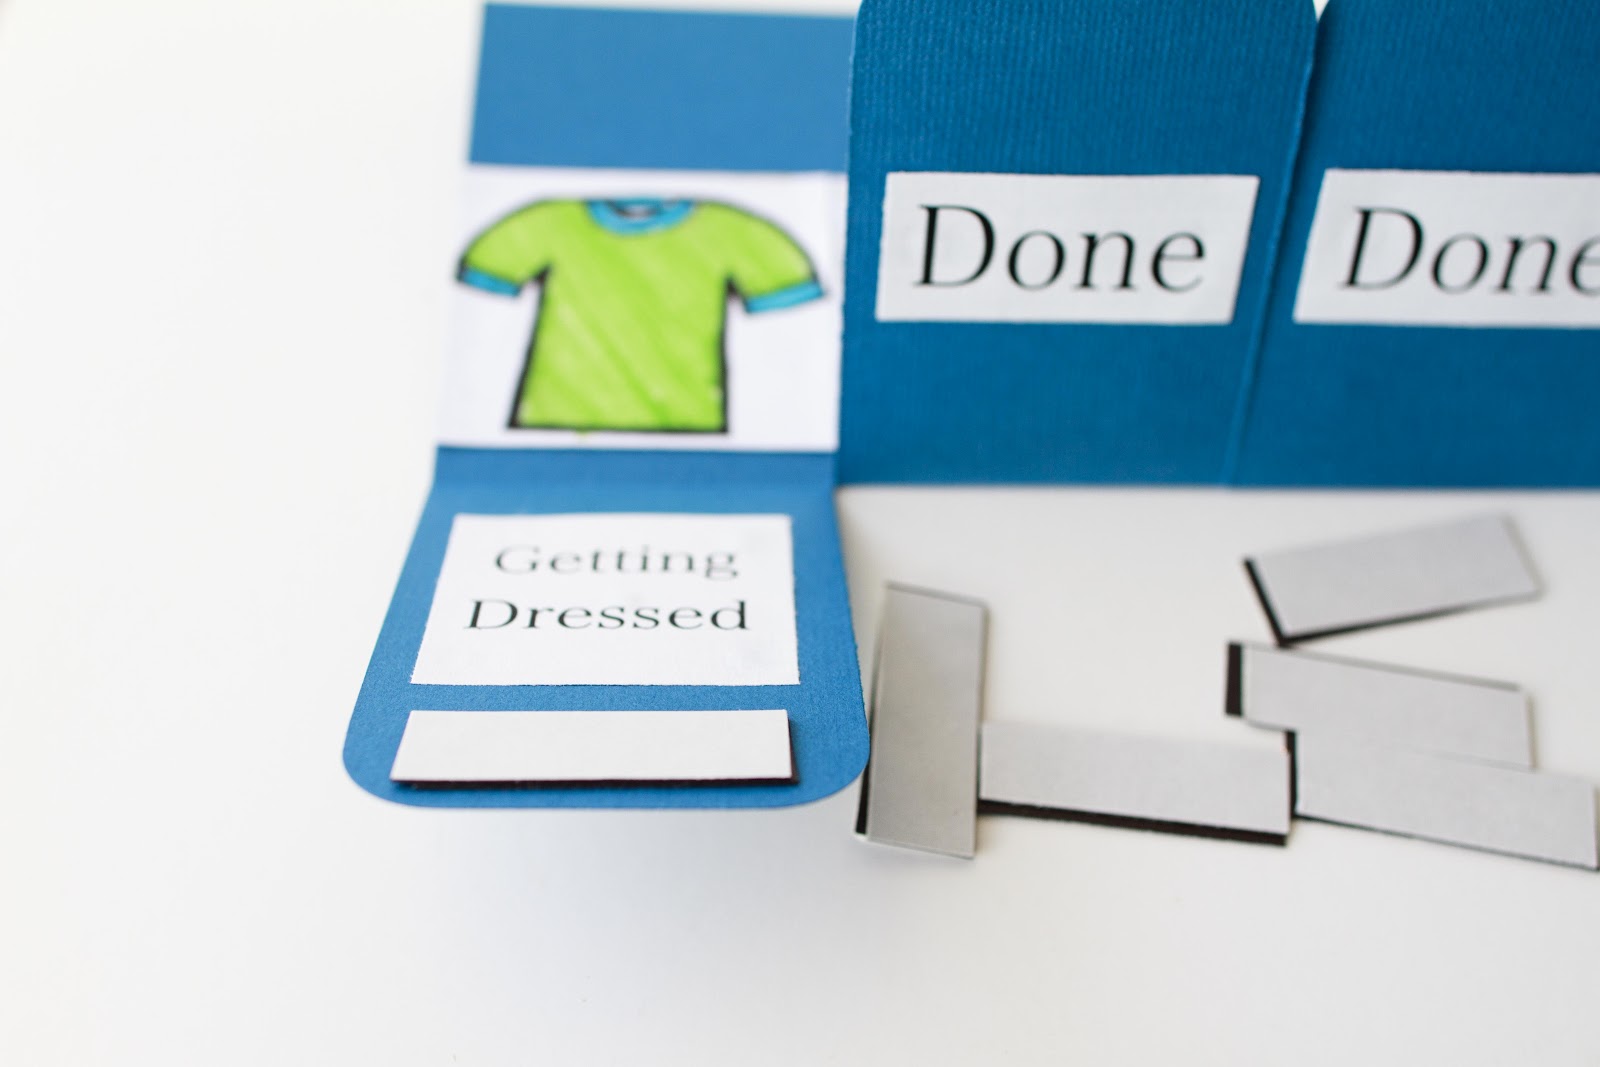
8. Peel off the sticker of the top magnet and fold the flap up to place the top magnetic strip. This will ensure that you’ve placed both pieces in the correct spot so they “stick” together.

9. Repeat step 8 until it’ all done.
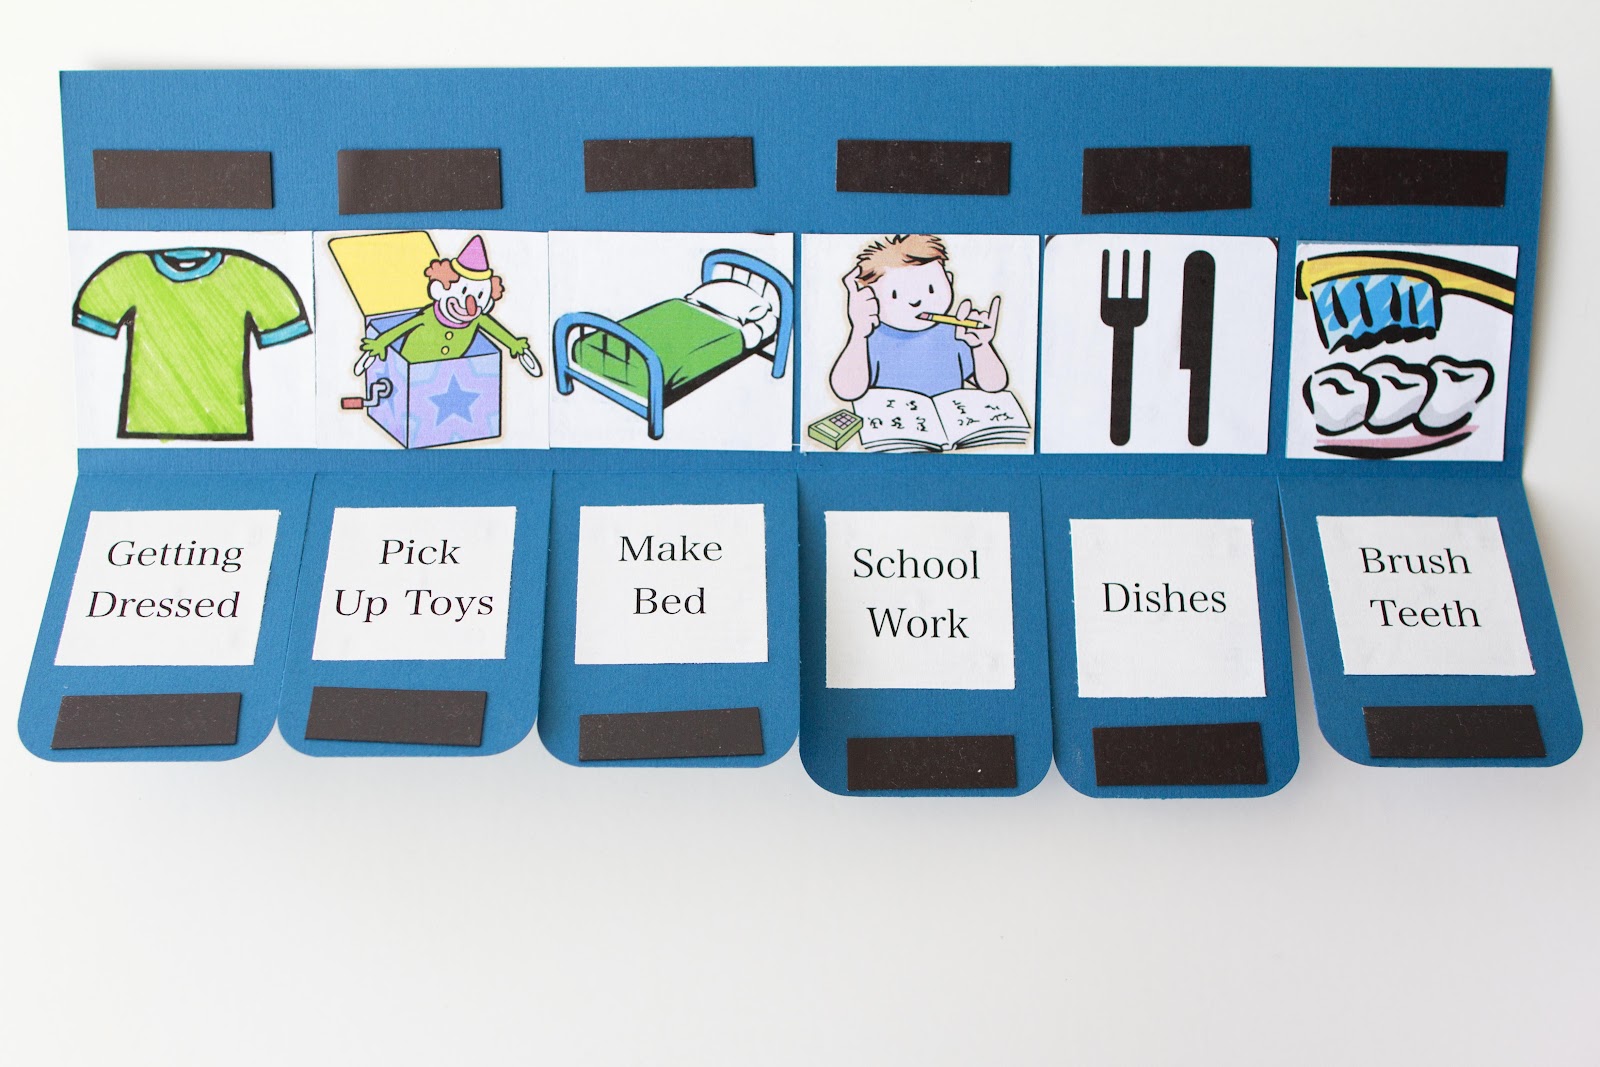
10. Adhere each ‘Done’ onto the center front side of the flaps.
11. Place somewhere in the house where it’s easy for your child to access
and see. Put up with 3M sticky stuff or tacks and your ready to go!
12. Now go tell your child to get to work!!! (LOL!)
Here is a sneak peek of my chore chart images (clip art) that you can print off yourself and use in this tutorial! There are 13 images in all. I made it so you could customize your own charts. It also includes chore titles for each one and “Done” front titles.
Find the colored version HERE and the black and white version HERE!